Controller
Controller
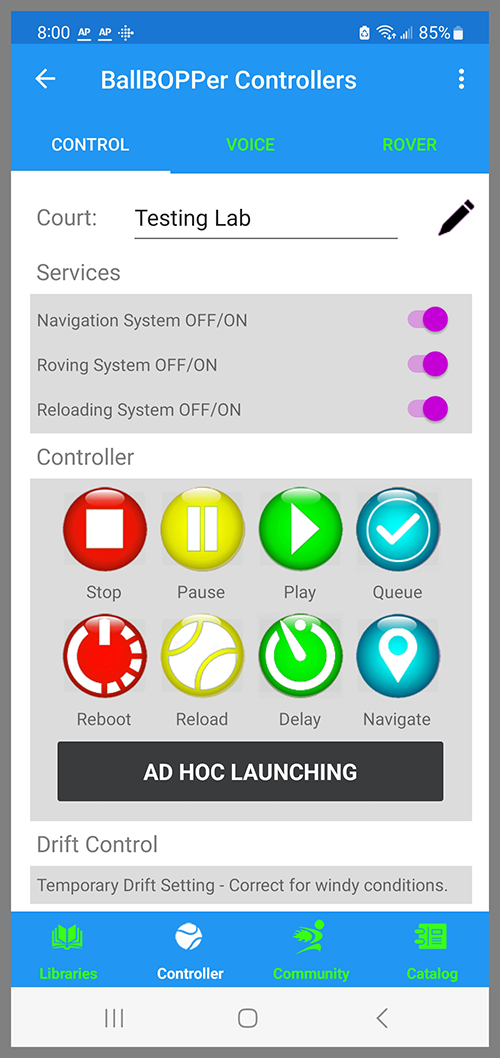
The Controller section gives you direct control over the BallBOPPer robot.

Court
The name you have given to the court that you are currently training on should be displayed at the top of the Controller page.
If you have never used the BallBOPPer on this court before, then you will need to run the court Navigation routine by pressing the Navigate button.
After pressing the Navigate button, the BallBOPPer will gather navigation data on the court, such as: the GPS location of the court, the depth of the margins around the court, which sides of the court have fences, and assures that the court is an ITF standard tennis court in good condition.
This data is saved under the name you assign. The next time you are training on that court, you do not have to run navigation again - the BallBOPPer will use the data previously gathered.
Services
The three Services switches on this page allow you to turn the Navigation, Rover and Reloader services On and Off.
If you are using the BallBOPPer in a location that is not a tennis court, such as your driveway or backyard, then the BallBOPPer will not be able to navigate and will indicate an ERROR.
The only way the BallBOPPer will operate when not on a tennis court is with the Navigation service turned Off.
With the Navigation Service turned Off, you will need to manually position and point the Robot in the correct direction. You may also need to adjust the Launch and Bounce points in your patterns according to the space that is available. It is best to create your own custom patterns that work specifically in your particular off-court location.
Controller: Stop, Play, Pause, Queue
The four buttons at the top of the Controller section mirror the functions of the four physical buttons on the BallBOPPer robot.
Stop will stop the BallBOPPer at its current position, and it will turn to face in the direction of the Player and wait.
When you press Stop during the playing of a Pattern or Playlist, the position in the Pattern or Playlist will be lost. The next time you press Play, the Pattern or Playlist will start playing from the beginning.
Pause will also stop the BallBOPPer at its current position.
The difference is that if you press Pause while playing a Pattern or Playlist, the position where it was paused in the Pattern or Playlist will be remembered, and when you press Play again, it will pick up where it left off.
Pressing the Queue button will send you to the Pattern Libraries where you can select from all of the possibilities in the libraries.
You then use the “Queue this Pattern” or “Queue this Playlist” in the Kabob menu on a Pattern or Playlist to transmit and queue the Pattern or Playlist on the BallBOPPer. These items are explained in the Libraries section of this documentation.
The way the Queue button works in the app, and the way the physical Queue button works on the robot, is different. If you press the Queue button on the robot, you can cycle through and select from only the Patterns and Playlists that you have previously Queued on the robot. This makes it possible to play Patterns and Playlists when on-court without a smartphone or tablet.
Controller: Reboot, Reload, Delay, Navigate
The second row of buttons in the Controller section: Reboot, Reload, Delay and Navigate; are the same as the physical buttons on the robot when you press and hold the physical button for three seconds.
Reboot will reboot the BallBOPPer’s onboard computer.
Pressing Reload will start BallBOPPer roving the court and reloading the balls back into the Ball Bucket.
The robot will only reload the balls that are found on it’s side of the court. Any balls that the player was unable to hit over the net, or ended up on an adjacent court, will need to be rolled into the BallBOPPer’s side of the practice court for reloading.
Press Delay instead of Play if you wish to Play a Pattern or Playlist after a short delay. Each time you press Delay will delay the start by 15 seconds. Press twice for a 30 second delay, three times for 45 seconds, etc.
Navigate is used for calibrating the Navigation system before beginning a training session on an unfamiliar court. This is explained under the Court section above.
Controller: Ad Hoc Launcher
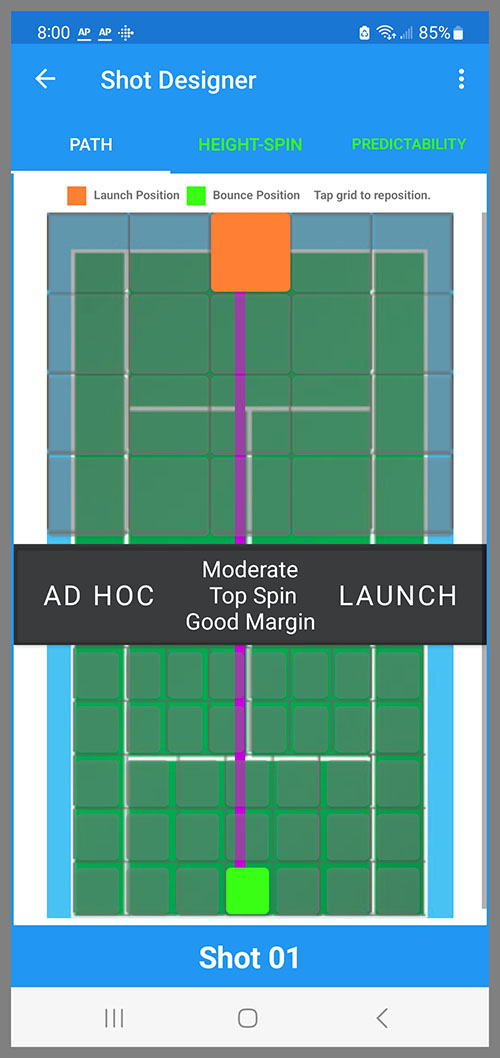
Pressing the Ad Hoc Launcher button in the Controller section will bring up the Ad Hoc Launcher screen.

The “Ad Hoc Launcher” feature has all the same functionality as the Shot Designer in the Pattern Library, but makes it available for the launching of individual balls. This is useful for coaches when they want to directly control the launching of each ball while working with a Player.
Pressing the “Ad Hoc Launch” button in the center of the screen will launch a ball from the selected location on the BallBOPPer side of the court (the top half of the screen), and bounce it on the selected spot on the player side of the court (the bottom half of the screen), with a particular spin and height above the net.
If you change the selected launch location, then the BallBOPPer will also Rove to the new launch location before launching the ball.
Drift Control
Scrolling further down on the Control page, you will find the Drift Control which is specifically for correcting for windy, or other conditions, that are preventing the launched balls from bouncing on their spots.
You can add or subtract distance, adjust the shots left or right, and elevate them higher or lower. These settings are temporary and revert to the default settings when you turn the BallBOPPer off.
Voice
Voice Control
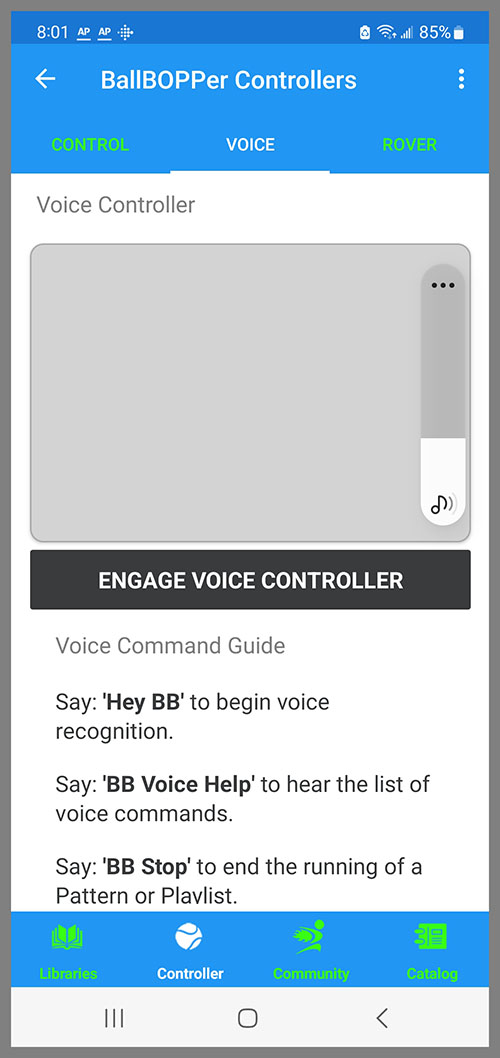
The Voice Control feature offers many of the same Commands as the Controller, but using your voice.
It is best to use a Bluetooth headset that is paired and connected to your smartphone or tablet. That way you can place your smartphone or tablet out of harms way while you play.

Upon pressing the Engage Voice Control button the BallBOPPer App will begin listening.
The text box at the top of the Voice Controller screen will display what the BallBOPPer is hearing you say, as you say it. This helps you pinpoint and correct command comprehension issues.
The list of specific BallBOPPer voice commands can be viewed by scrolling further down on the page.
Each command is preceeded by “BB” which is short for BallBOPPer.
You must say “BB” plus the command in order to get a response.
Rover
Rover Controller
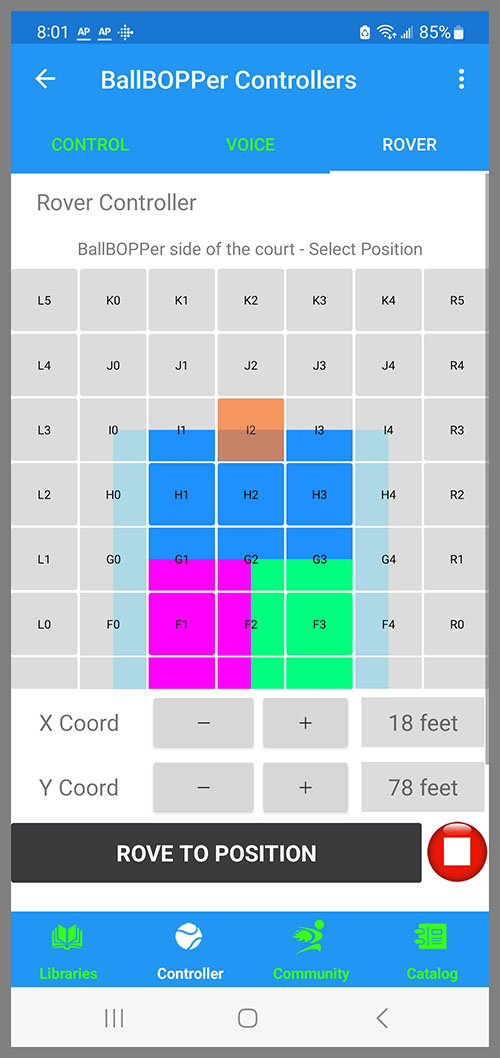
The Rover Controller is a positional controller that gives you the ability to send the BallBOPPer to a particular position on the BallBOPPer’s side of the court.

Press the spot where you want the BallBOPPer to move to, then press the “Rove to Position” button, and the BallBOPPer will travel to that spot, shutdown and wait.
The Stop button is included in the event you need to stop the BallBOPPer while roving.